Have you ever made a wall hanging but it never made it on the wall because it has no way to hang? Well then I’m sure you’ll enjoy this tutorial.
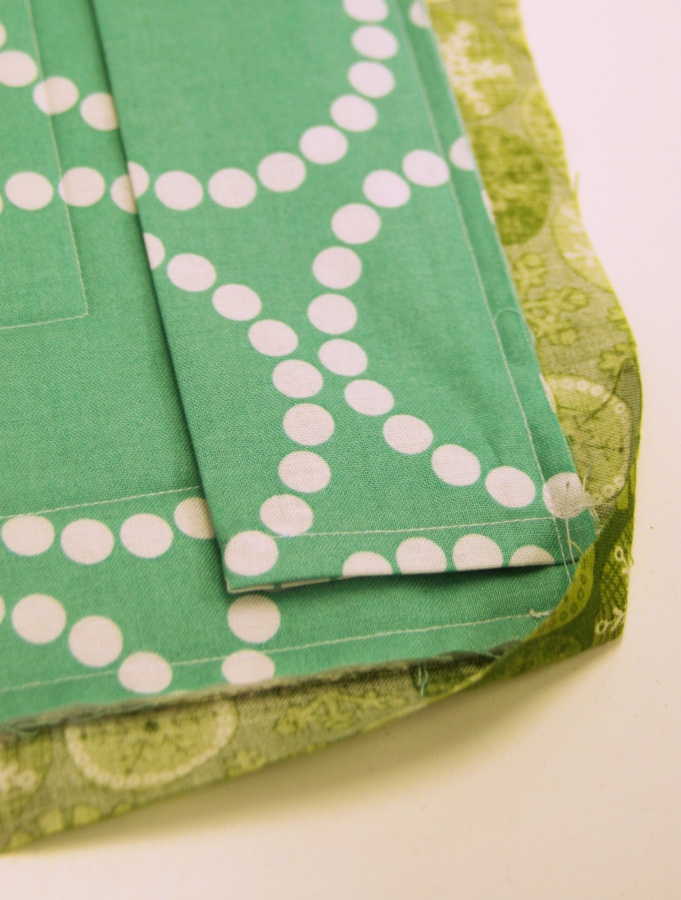
First measure the width of the top of your project you want to put the hanging sleeve on. I usually cut the strip of the fabric to this exact length. You need the sleeve little bit shorter than the actual width but as you will roll 1/4 inch twice on each end and top stitch to neaten up the edges, this will just shorten it by half an inch on each side, which is exactly what you need.
If you are sending your piece to a competiotion or think you once might, most of them require hanging sleeve which is 4″ wide. In which case you need to cut your strip 8 and a half inch wide. (Or 9″ to be on the safe side.) If you know you will just hang it at home anything between 3 -8 inches width will do the job – it’s not a science! You can choose the same fabric as your backing, or the binding or something completely different – it’s entirely up to you! There is no quilting police who will come and check it 🙂
So once you have the strip cut to the right length and desired width, neaten up the side edges by folding 1/4 inch twice and top stitching.

Ideally you can save yourself one row of hand sitching if you attach the sleeve to your work at the same time as your binding. Fold the sleeve in half lengthwise and press. Next pin the sleeve to the back of your hanging to the top edge, lining up the raw edges of the sleeve with the top edge of the hanging. Attach the binding as you are used to, fold over and sew on the back either by hand or by machine. Once the binding has been finished you can come back to finishing the sleeve.
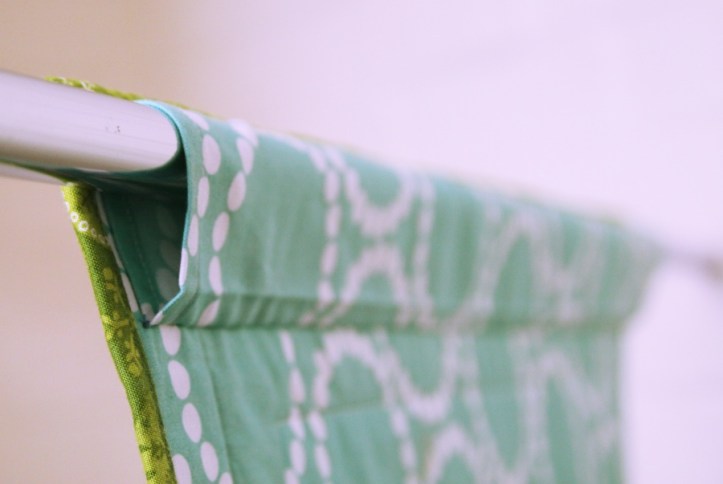
Top edge of the sleeve is now secured. All wee need to do next is hand stitch the bottom edge. In order to do so, we first need to give to the top layer of the sleeve bit more volume. Take the crease you have made earlier with an iron and finger press another one about 1/4 inch under the first one keeping the excess of the fabric on the top. This way the bottom layer of the sleeve will be shorter than the top one – also it will create a letter D from the profile.

This volume is very essential to make a space for the rod you will use for hanging. If the sleeve was flat, the rod would make the top of the hanging to bulge.

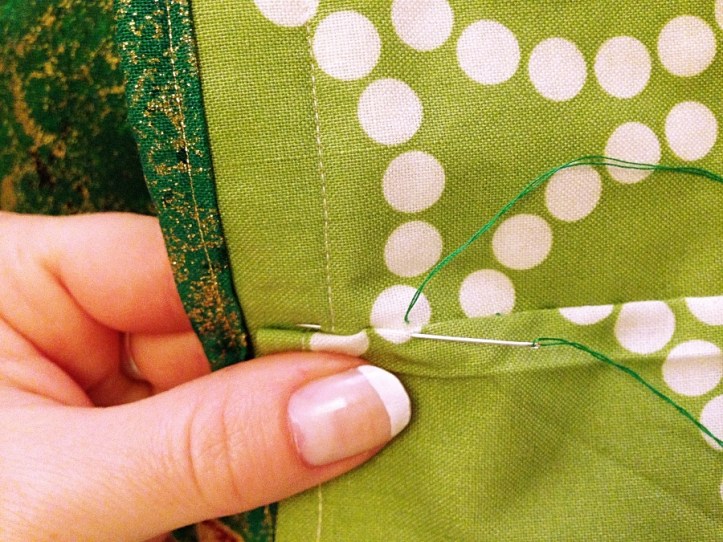
To attach the bottom edge of the sleeve to the hanging, pin the edge in place and use invisible stitch – make sure you are only sewing it to the backing not through all the layers of the hanging as that would show on the front!
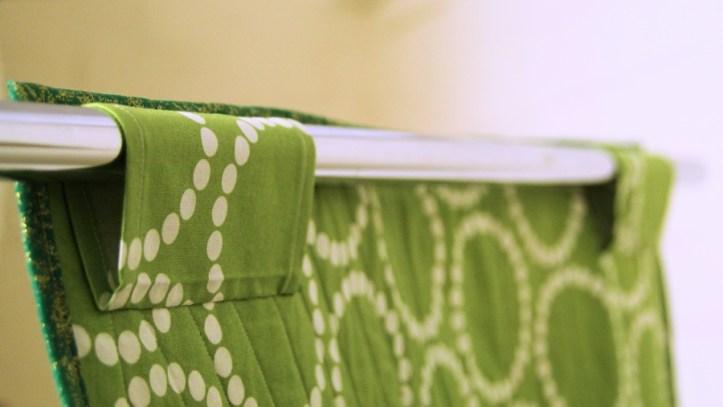
If your hanging is max half a meter wide and you are short on fabric, you can also use two smaller pieces for a hanging sleeve – attach them to either end.

You can’t really use it on the longer pieces as the middle would bend down with time.
Hope this helps, let me know how you get on with your SLEEVE!
Thank you for reading
Vendulka

